Introduction
Proper dryer vent installation is crucial for maintaining the efficiency, safety, and longevity of your dryer. A correctly installed dryer vent ensures effective removal of moisture and lint from your laundry room, reducing the risk of fire hazards and improving your dryer’s overall performance. In this guide, we will explore the importance of dryer vent installation, discuss the key steps involved, highlight common materials and tools needed, and provide tips for optimizing the installation process.
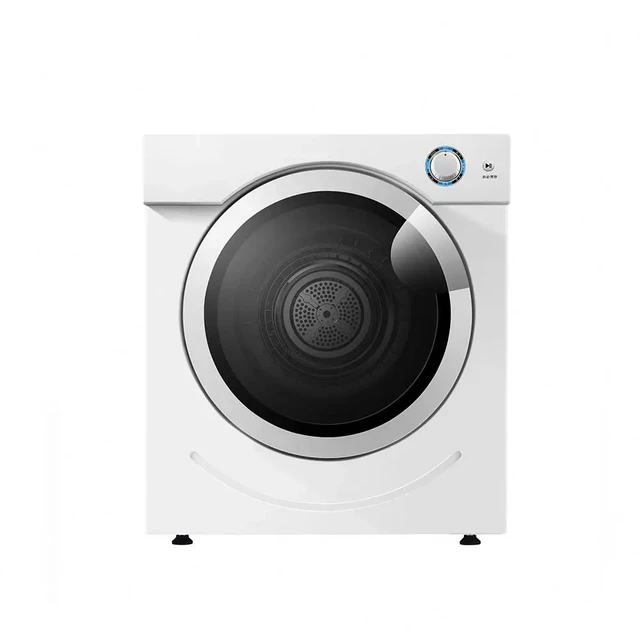
Efficient and Safe: Proper Dryer Vent Installation for Optimal Performance
I. Understanding the Importance of Dryer Vent Installation
-
Moisture and Lint Removal:
- The primary purpose of a dryer vent is to remove moist air and lint from the dryer during each drying cycle. Without proper venting, these byproducts can accumulate in your laundry room, leading to moisture-related issues, mold growth, and decreased indoor air quality.
-
Fire Safety:
- Lint, a highly flammable material, can accumulate in your dryer and vent line. A properly installed dryer vent minimizes the risk of lint build-up, which is a common cause of dryer fires. By ensuring proper ventilation, you protect your home and loved ones from potential fire hazards.
-
Energy Efficiency:
- Proper dryer vent installation promotes energy efficiency by allowing the dryer to expel hot, moist air and operate more effectively. A clogged or inefficiently installed vent can cause the dryer to work harder and consume more energy, resulting in increased utility bills.
II. Tools and Materials Needed for Dryer Vent Installation
-
Vent Pipe:
- Choose a rigid metal duct, such as aluminum or galvanized steel, for optimal airflow and durability. Avoid using vinyl or flexible plastic ducts, as they can easily trap lint, become flattened, or collapse, hindering proper ventilation.
-
Duct Clamps:
- Secure the vent pipe connections with metal duct clamps. These clamps provide a tight and secure seal, preventing leaks or separation, and ensuring the vent pipe stays connected to both the dryer and the vent outlet.
-
Vent Cap:
- Install a vent cap or hood on the exterior wall or roof to prevent debris, pests, and weather elements from entering the vent line. Choose a cap that is durable, weather-resistant, and designed to provide adequate airflow.
-
Vent Tape or Aluminum Foil Tape:
- Use vent tape or aluminum foil tape to seal any joints or connections within the venting system. Avoid using duct tape, as it may deteriorate over time and fail to provide a reliable seal.
-
Vent Brush or Cleaning Kit:
- Invest in a vent brush or cleaning kit to regularly remove lint and debris from the vent pipe. This helps maintain optimal airflow and prevents clogs from forming, reducing the risk of fire hazards.
III. Steps for Proper Dryer Vent Installation
-
Determine the Installation Route:
- Choose an appropriate route for the vent pipe. Ideally, the vent should be as short and straight as possible, with minimal bends or twists. Avoid long runs, sharp turns, or excessively vertical installations, as these can impede airflow and increase the risk of lint accumulation.
-
Measure and Cut the Vent Pipe:
- Measure the length needed for the vent pipe, ensuring it reaches from the dryer’s exhaust outlet to the exterior vent cap location. Use a tubing cutter or a hacksaw to cut the vent pipe to the proper length. Ensure clean, square cuts for a secure fit.
-
Connect the Vent Pipe to the Dryer:
- Attach one end of the vent pipe securely to the dryer’s exhaust outlet using a metal duct clamp. Use pliers or an adjustable wrench to tighten the clamp, ensuring a snug and airtight connection.
-
Route the Vent Pipe to the Exterior:
- Securely connect the other end of the vent pipe to the designated vent outlet on the exterior wall or roof. Position the vent pipe in a way that provides a straight, horizontal run or a slight upward angle to prevent lint buildup. Secure all connections with metal duct clamps and seal them with vent tape or aluminum foil tape.
-
Install the Vent Cap or Hood:
- Attach the vent cap or hood to the exterior wall or roof, ensuring it is securely fastened and weather-resistant. The vent cap should have a flapper or louvers to allow air to exit but prevent debris from entering.
-
Test for Proper Airflow:
- After installation, turn on the dryer and verify the presence of proper airflow through the vent system. Ideally, you should feel a strong, steady stream of warm air exiting the vent cap or hood on the exterior of your home.
IV. Tips for Effective Dryer Vent Installation
-
Follow Manufacturer Guidelines:
- Always refer to your dryer’s installation instructions for specific guidelines and requirements. Different dryer models may have varying specifications, including vent pipe diameter and maximum allowable vent lengths.
-
Clean the Vent Regularly:
- Regularly clean the vent pipe and lint trap to prevent lint accumulation and maintain optimum airflow. Perform routine checkups every few months to ensure the venting system remains clear and efficient.
-
Avoid Using Screws:
- When connecting vent pipes or securing duct clamps, avoid using screws as they can catch lint and obstruct airflow. Instead, opt for metal duct clamps or tape specifically designed for venting systems.
-
Consider Professional Installation:
- If you are unsure about the installation process or encounter any challenges, it is advisable to consult a professional appliance service technician or HVAC contractor who specializes in dryer vent installation.
VI. Troubleshooting and Maintenance
-
Addressing Venting Issues:
- If you notice poor drying performance or excessive lint accumulation, it could indicate a venting problem. Inspect the vent pipe for any obstructions, such as a buildup of lint or debris. Use a vent brush or cleaning kit to remove any blockages and ensure optimal airflow.
-
Regularly Clean the Lint Trap:
- Cleaning the lint trap after each load is essential for maintaining proper dryer function and preventing lint particles from accumulating in the venting system. Remove the lint trap, remove any lint buildup, and rinse it under water to clear any residue. Allow it to dry completely before reinserting it into the dryer.
-
Monitor Dryer Performance:
- Pay attention to any changes in your dryer’s performance, such as extended drying times, excessive heat, or unusual noises. These could be indicators of a venting problem or a malfunctioning dryer. If you notice any irregularities, consult a professional technician to diagnose and address the issue promptly.
-
Schedule Professional Maintenance:
- Periodically schedule a professional maintenance service for your dryer and venting system. An experienced technician can thoroughly inspect, clean, and evaluate the system, ensuring optimal performance and safety. Regular maintenance can help identify and rectify potential issues before they escalate.

V. Conclusion: Proper Installation for Optimum Performance
Proper installation of a dryer vent is essential for ensuring the efficient and safe operation of your dryer. By understanding the importance of dryer vent installation, gathering the necessary tools and materials, and following the outlined steps, you can optimize airflow, mitigate fire hazards, and enhance the longevity of your dryer.
Remember to prioritize safety by using appropriate materials, securing connections with metal duct clamps, and regularly cleaning the venting system. With a correctly installed dryer vent, you can enjoy an energy-efficient, reliable, and safe laundry experience for years to come.

