A clogged dryer vent can pose serious risks, including reduced efficiency, longer drying times, and even potential fire hazards. Regular maintenance of your dryer vent is crucial, but the idea of moving the heavy appliance can be daunting. The question is: how to clean a dryer vent without moving the dryer? In this comprehensive guide, we’ll explore step-by-step methods to safely and effectively clean your dryer vent while keeping the appliance in place. We’ll discuss the tools needed, practical techniques, and tips to ensure your dryer remains in optimal condition.
Understanding the Importance of Vent Cleaning
Knowing why it’s essential to clean your dryer vent helps in appreciating the need for this maintenance task.
Safety Concerns
A clogged dryer vent is a significant fire hazard. Lint buildup can ignite, leading to devastating fires. Regular cleaning minimizes this risk, providing peace of mind for you and your family.
Efficiency and Performance
A clean vent ensures your dryer operates efficiently. When the vent is clogged, the dryer has to work harder to expel humid air, leading to longer drying times and increased energy consumption. Maintaining a clean vent optimizes performance and reduces energy costs.
Prolonging Appliance Life
Regular maintenance, including vent cleaning, extends the lifespan of your dryer. By reducing strain on the appliance, you enhance its durability and reliability. This preventative care can save you money on repairs and replacements.
Gathering the Necessary Tools and Materials
Equipping yourself with the right tools and materials simplifies the vent cleaning process.
Essential Tools
You’ll need a dryer vent cleaning kit, which typically includes flexible rods and a brush head. A vacuum cleaner with a hose attachment is also essential for removing loosened debris. Having these tools on hand ensures you’re prepared for the task.
Additional Supplies
Consider having a screwdriver to remove the vent cover and possibly a flashlight to inspect the inside of the vent better. These additional supplies facilitate thorough cleaning.
Safety Gear
Wear safety gear such as gloves and a mask to protect yourself from dust and debris. Safety precautions are vital for a safe and efficient cleaning process.
Preparing for the Cleaning Process
Proper preparation sets the stage for an effective cleaning process without moving the dryer.
Unplugging the Dryer
Ensure the dryer is unplugged from the electrical outlet for safety. This step eliminates the risk of electric shock during the cleaning process. For gas dryers, also turn off the gas supply as a precaution.
Locating the Vent
Identify the location of the dryer vent’s connection to the wall or floor. This identification helps you understand the vent’s path and where you’ll be focusing your cleaning efforts.
Removing the Vent Cover
Use a screwdriver to remove the vent cover if it’s attached. This removal provides better access to the vent for thorough cleaning.
Cleaning the Lint Trap and Housing
Start by cleaning the lint trap and its housing, as these areas frequently accumulate lint.
Removing the Lint Trap
Take out the lint trap and clean it thoroughly. Use a brush or your hands to remove all lint. Regular cleaning of the lint trap enhances the dryer’s efficiency.
Cleaning the Housing
With the lint trap removed, use your vacuum cleaner’s hose attachment to clean the lint trap housing. This step ensures no lint remains that could clog the vent further down the line. A clean housing contributes to better air flow and overall efficiency.
Inspecting for Obstructions
Carefully inspect the lint trap housing for any obstructions or hardened lint deposits. Remove any found obstructions to ensure clear air passage. This inspection ensures the vent system remains unclogged.

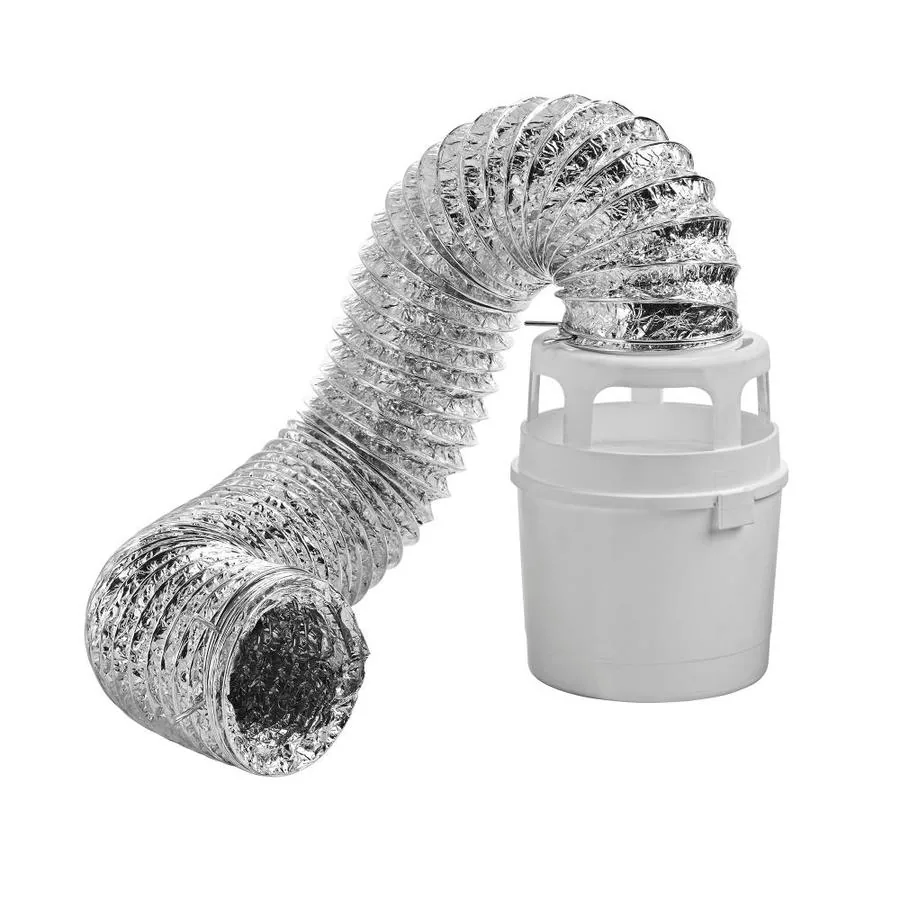
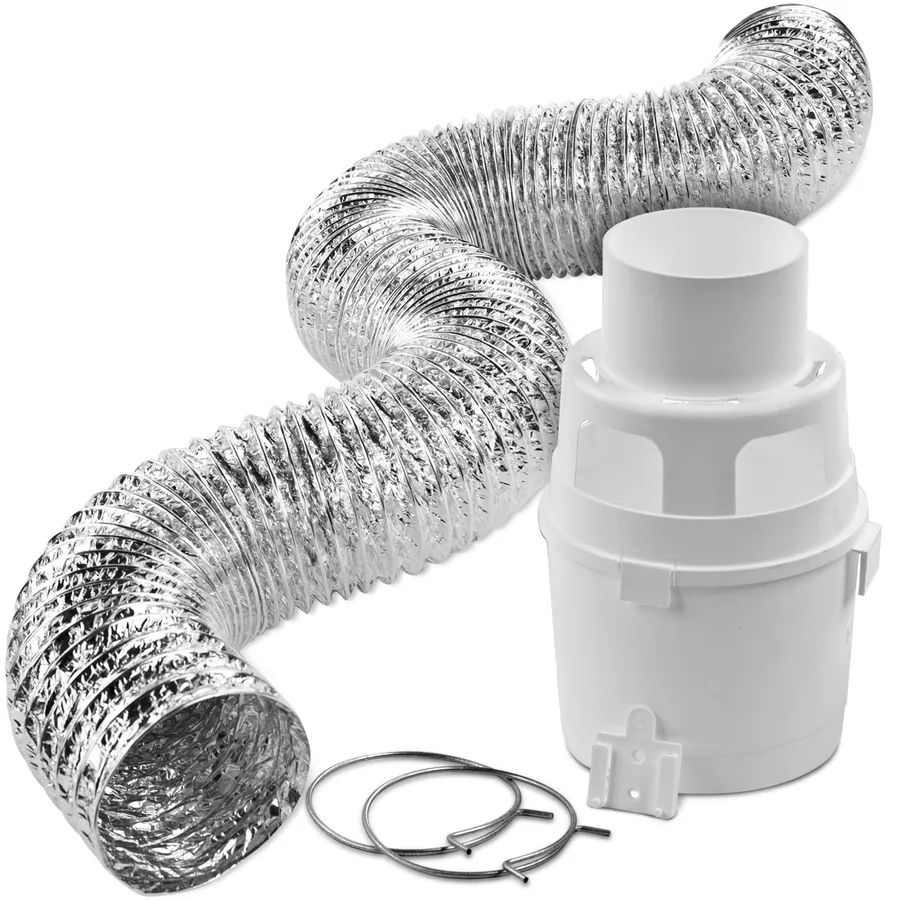
Using a Dryer Vent Cleaning Kit
A dryer vent cleaning kit is designed specifically for this purpose, making it easier to clean the vent without moving the dryer.
Assembling the Kit
Follow the manufacturer’s instructions to assemble the flexible rods and attach the brush head. Proper assembly of the kit ensures effective cleaning.
Inserting the Brush
Insert the brush head into the vent opening and push it as far as it will go. The flexible rods allow the brush to navigate bends and turns in the vent. Proper insertion maximizes the cleaning reach.
Rotating the Brush
Rotate the brush inside the vent to loosen lint and debris. Continue to push and pull the brush to reach all areas of the vent. The rotating action effectively dislodges accumulated lint.
Removing the Brush
Carefully retract the brush and remove it from the vent. Repeat the process as needed to ensure thorough cleaning. Multiple passes may be necessary for heavily clogged vents.
Vacuuming the Vent
Using a vacuum cleaner helps in removing loosened debris and ensures a cleaner vent.
Attaching the Hose
Attach the hose to your vacuum cleaner and insert it into the vent opening. The vacuum’s suction power will help extract lint and debris loosened by the brush. Proper hose attachment ensures effective debris removal.
Vacuuming Action
Turn on the vacuum and move the hose back and forth to capture all loose particles. Be thorough to ensure all debris is sucked out. Thorough vacuuming minimizes the risk of remaining blockages.
Inspecting the Vent
After vacuuming, inspect the vent with a flashlight to ensure it’s clean. Address any areas that still have visible debris. A final inspection ensures no areas are missed.
Cleaning the Exterior Vent
Cleaning the exterior vent is as important as the interior to ensure optimal airflow.
Locating the Exterior Vent
Find the exterior vent outlet, which is usually located on an outside wall of your home. Proper identification of this vent is crucial for cleaning.
Removing the Cover
If the exterior vent has a cover, remove it carefully. This step provides better access for cleaning. Proper removal ensures thorough cleaning.
Cleaning the Vent
Use the brush and vacuum to clean the exterior vent. Ensure that any flaps or screens are free from obstructions. Thorough cleaning of the exterior vent ensures maximum airflow.
Replacing the Cover
Once clean, replace the exterior vent cover securely. Proper replacement maintains the vent system’s integrity.
 Preventive Maintenance Tips
Implementing preventive measures helps keep your dryer vent clean and functioning efficiently.
Regular Cleaning
Clean the lint trap after every use and inspect the vent regularly for any signs of clogging. Routine maintenance prevents serious blockages and ensures efficient operation.
Annual Deep Cleaning
Perform a deep cleaning of the entire vent system at least once a year. This comprehensive cleaning eliminates accumulated lint and debris. Annual maintenance ensures long-term efficiency and safety.
Professional Inspection
Consider having a professional inspect your dryer and vent system periodically. Professionals can identify and address issues that may not be evident. Professional inspections ensure the system’s overall health.
Checking Connections
Ensure all vent connections are secure and free from damage. Loose or damaged connections can lead to inefficient operation and potential hazards. Regular checks prevent issues before they escalate.
Reassembling and Testing
After cleaning, reassemble any removed components and test the dryer to ensure everything works correctly.
Reattaching the Vent Cover
Reattach any vent covers you removed during the cleaning process. Ensure they are secured tightly to prevent any air leaks. Proper reattachment maintains the vent system’s efficiency.
Plugging In the Dryer
Plug the dryer back into the electrical outlet. For gas dryers, turn the gas supply back on. Ensuring proper power supply is crucial for testing.
Running a Test Cycle
Run a test cycle to verify that the dryer operates smoothly and efficiently. Check for any unusual noises or signs of restricted airflow. Testing ensures the cleaning was successful.
Monitoring Performance
Monitor the dryer’s performance over the next few cycles to confirm the vent is clear and functioning properly. Continued monitoring helps identify any issues early.
Conclusion
Knowing how to clean a dryer vent without moving the dryer is a valuable skill that enhances safety and efficiency. By following the detailed steps provided, you can maintain your dryer’s performance and reduce fire risk without the hassle of moving the appliance. Regular maintenance, including cleaning the lint trap and vent system, not only optimizes dryer function but also prolongs its lifespan. Whether you’re a seasoned DIY enthusiast or just starting, this guide empowers you to keep your dryer vent clean and your home safe.